
Showing posts with label Featured. Show all posts

Monday, September 13, 2010

A Small Herd of Spiders

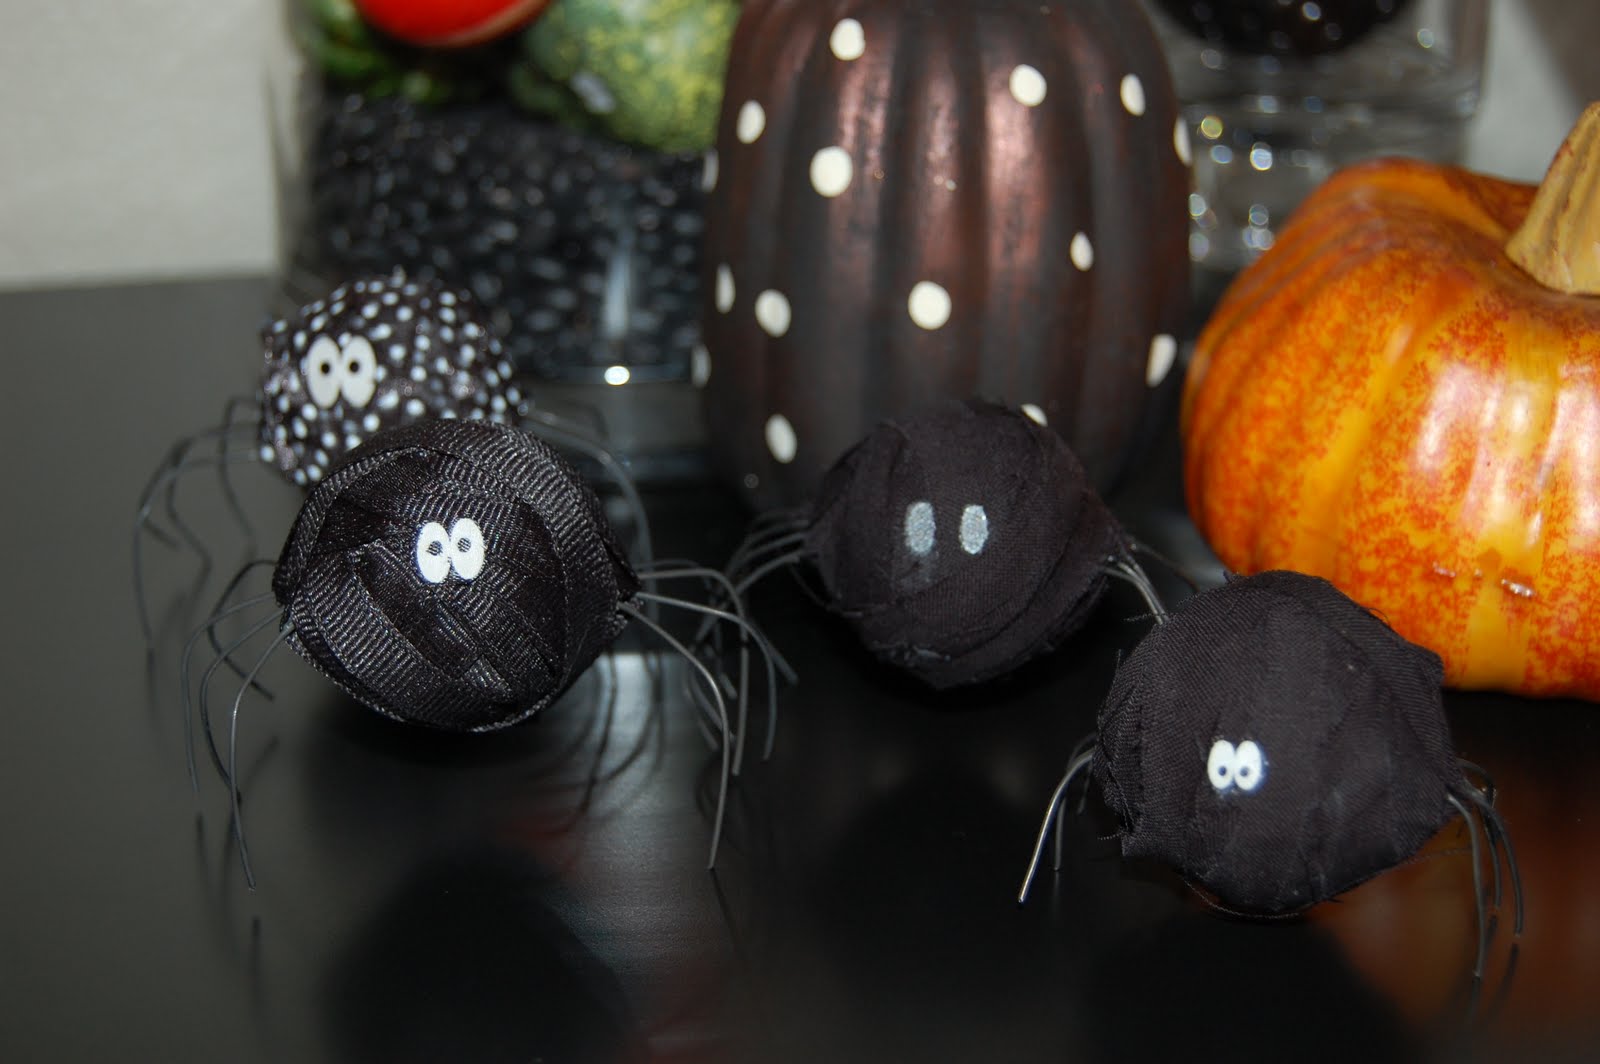
Because I am impatient and one of my readers mentioned making the legs longer I had to make more spiders!  Eek!  Now I hate despise real spiders, so I didn't want mine to be scary, I wanted them to be cute!
Semi Transparent Polka Dot Ribbon
Black Cotton Fabric
Black Grosgrain Ribbon
Black Cotton Fabric
 I think they are so stinking cute!  And they cost next to nothing!  I spent $1 on the table tennis balls at the Dollar Tree and I had everything else!  Yipee!

Dollar Tree Purchase, also used these in my apothecary jars
The table tennis balls measured 5" around, so I made 4 marks on each side 2.5" across from each other.
4 dots on each side
Next I used a teeny tiny drill bit and drilled the holes.


I cute 4 pieces of 20 gauge wire approximately 6" long and threaded it through my spider.
This is were my tutorial falls apart.....Blonde Moment!  I forgot to take pictures of the rest.  Boo!!  Anyway, make sure your wires are even and hot glue on each side.  It doesn't matter what it looks like because you will cover it up.
*When I make more I will update with pictures!*
Take your fabric or ribbon and hot glue it to the bottom.  Start wrapping your soon to be spider!  When I needed to change directions I would cut the fabric and hot glue it to the bottom and start over again.  You can wrap as much or as little as you like, I just made sure to cover all the white spots.
When you are finished wrapping, bend your legs down so your spider stands on its own.  You may have to trim a leg or two.  You can use whatever you like for the eyes, 1 of my spiders has silver sharpie ovals for eyes.  For the other spiders I found some really cute "eye" ribbon at WalMart.  I cut out 3 sets of eyes and hot glued them on.

I really want to make some more, but I need to go buy some more ribbon for variety!  How cute would a gingham spider be?!?! 

Featured on Bobbypin's Boardwalk

Sunday, September 12, 2010

Painted Pumpkins

After seeing all of the fall decorating going on in blogland I got the bug and got some of my stuff out.  Today I wanted to show you the pumpkins that I painted last year.  I love them!


I bought these pumpkins at WalMart last year.  I think they are the $5 Better Homes and Garden pumpkins.  I used craft paint to paint them.  I used antique white, black and copper.  I free handed the black leaves on the white pumpkin.

I love polka dots!


I even made monogrammed pumpkins for the kids before I even knew monograms were cool!

Dining Room sideboard and shelves....Taylor really wanted to help!
Close up of my apothecary jars, look they are all filled!  I found the white tennis table balls at the Dollar Store and plan to make some knock off PB numbered balls.
  There are so many cute ideas floating around that I can't wait to borrow copy them!  I hope everyone has a wonderful day!

Featured @ Craft-o-Maniac
All Things Related
Oopsey Daisy
Crazy Domestic
Tatertots and Jello
Burlap + Blue

Sunday, August 15, 2010

I Finally Joined the Cool Kids Club!

I finally joined the cool kids club!  What club am I talking about?  I finally made my own chalkboard!  I am so excited!  Up until this afternoon I was the geek hanging out in the corner by myself!


Here it is!  Love it!!

I started with this nasty mirror that I found at a garage sale for $2.
I am trying to get away from painting everything in my house black so I settled for green.


It ended up being way too green for my liking so I used black craft paint to glaze it.
When I asked my husband what he thought he said it looked dirty and old...mission accomplished!

I used chalkboard spray paint and followed the directions completely, kind of.  I sprayed the mirror with 3 coats of paint and let it dry for 20 hours, not the recommended 24 hours.  I couldn't find any chalk in the house, how can you have a chalkboard with no chalk?!?!  So I settled on using sidewalk chalk to break-in the chalkboard according to the directions.

Maybe not the best idea...see all the little scratches?  They aren't very noticeable and I was too excited to redo it and wait another 24 hours!
I put the mirror back in the frame and used hot glue to secure it.


I can't wait to use it!  I think I will write down important reminders or list the menu for the night!  I need to add a few more things on the wall to spruce it up, but this wall is on its way to being done!

Featured @ Random Crafty Georgia Girl

Wednesday, July 28, 2010

Watermelon Anyone?

I am in birthday mode!  Only 5 weeks til Tay turns 2 {insert tear here}.  I finished her invitations tonight!  And of course since it's 10 o'clock I can not get a decent picture, I will try again tomorrow when the sun is out.  But for now here they are!

Tay ♥'s Watermelon!


Have I mentioned that I now my sewing machine?  Paper is so much easier to sew than fabric, there are no folds or seams that I have to worry about!  I have seen so many cards on etsy that are embroidered that I figured I would give it a try.  It was so easy!

I figured out a little trick!  It only took me 3 cards to figure out because I was too lazy to get up and google sewing paper!  There is an annoying string that shows on the front of the card and I knew I couldn't cut it off because my card would fall apart because I was too lazy to glue the pink paper to the green paper before sewing it!

Notice the annoying string?
 Carefully pull your bottom(bobbin) string from the back of the card.  It will create a loop like the picture on the right.  Gently pull the loop until the annoying string is pulled all the way through and both of your strings are on the back.

So much prettier without said annoying string!
I used my cricut to cut the watermelons using the Doodlecharms cartridge.  I found the paper at Hobby Lobby, it is My Mind's Eye Penny Lane Collection.  I cut the seeds out of glitter card stock.

I think they are finished...part of me wants to add something else to them.  "Hi my name is Kenzie and I can't leave well enough alone."  I need an intervention!  Hope everyone has a great night!

Featured at Craft-O-Maniac

Saturday, July 17, 2010

Harley Inspired

I am finished with my latest project!  It was miserable and I hated it 50% of the time that I was making it but I think it turned out awesome!


Harley Davidson inspired invitations!  My good friend is throwing a surprise birthday party for her boyfriend!  When she asked me if I would make the invitations I was hesitant to say yes because I usually don't do "boy" stuff let alone "man" stuff.  Fortunately for me he happens to be a biker and happens to ride a Harley!  So in true Harley style I used black, white, orange and grey.  The skull was easy, it looks tough and bikerish but it wasn't enough.  So I added metal mesh and hand-made barbwire.


The barbwire was the worst idea ever, but completely genius!  My fingers hurt so bad from wrapping wire.  But I think it adds the right touch of "man bling" to the invite!

I used the Indie Art cartridge from Cricut for the skull.  The skulls were also a huge pain in the you know what!  I inked the skulls and the crossbones.  The crossbones were not attached to the skull so I had to glue them all on...Boo!


Thank goodness for my spray adhesive!  Have I ever told you how much I love that stuff?  Oh yeah, I did here.  It is strong enough to adhere the metal mesh to the card, love, love, love it!


This project was a success, thank goodness....not that I was worried or anything!

Featured at Life in the Pitts

Wednesday, July 7, 2010

Camera Strap Cover

So I am feeling better, just achy and exhausted!  I couldn't stand to lay in bed for another minute and I didn't feel good enough to go anywhere so I decided sitting up and sewing was a good alternative.  I have seen gorgeous camera strap covers everywhere and have been wanting one for a while now.  But I am way too cheap to pay the kind of money they want for them so I decided to make my own.

I refuse to show pictures of how I made it, if you are a real seamstress you would probably keel over and die!  My Mom and Gramma are amazing seamstresses, I really need to sit down with them and get a real sewing lesson.  But for now my method works!
There are definitely some improvements that can be made but for my first one I love it!  I will definitely be making another one!

Don't forget to enter the $25 Target Gift Card here

Featured at Tatertots and Jello

Monday, June 28, 2010

Button!

My button is being featured at Twelve Crafts Till Christmas today!

Photobucket

I am so excited!  Elizabeth is an amazing crafter and a great blog friend!  Her blog is so cute, it is dedicated to creating 1 craft a month over a 12 month period for Christmas gifts.  She has made some of the cutest things!
So go check me out here!

Saturday, June 26, 2010

Personalized Gifts

I had the honor of attending a great friends baby shower today!  And of course I waited until the last minute to make a gift....I started it last night!  I love to receive personalized hand made gifts, it always makes me feel special, so I try to always make something for special occasions.  I decided to make a monogrammed frame, a name block, and I attempted a pillow that turned out ok.

K is for Khloe, isn't that the sweetest name!  I started with a red frame from the dollar store and spray painted it Heirloom White.
I almost remembered to take a picture before I started glazing it with my Ralph Lauren "Smoke" glaze.
Here it is finished  I used my Cricut to cut the K out of pink vinyl and applied it directly to the glass.  I used a staple gun to attach ribbon to the back of the frame to hang it with.
I love name blocks, I think they are adorable.  I used 2x2's and cut them down to the size I wanted.  I painted them with craft paint (I literally finished this 5 minutes before I left) and glazed them.  I applied the paper with spray adhesive and sanded the edges.  I cut her name out of pink vinyl and applied it directly to the wood.
 Here is my pillow attempt.  I used muslin and some cute white eyelet trim.  I used heat and bond to "sew" my pillow, I think it would have been so much faster to use a sewing machine but didn't want to drag myself over to my Gramma's to borrow hers....lesson learned.  I cut the crown out with my Cricut and the Home Decor cart and used craft paint and a dauber thing to paint it.  Not bad for 30 minutes!

I hope everyone had a wonderful weekend! 

Featured at bobbypins boardwalk
Tatertots and Jello
Related Posts with Thumbnails